
Introduction
This guide will introduce you to the basics of embroidery by hand: materials, and tools needed, a few common simple stitches, and handy tips & tricks!
-
-
1. Embroidery hoop - choose the size based on the size of fabric being used and how large the design will be
-
2. Fabric - You can embroider just about any type of fabric' - as long as the hoop you are using is able to fit within the piece of clothing and/or the hoop will not over-stretch the fabric'
-
3. Embroidery needle - chose your needle based on how thick your fabric is; the thicker the fabric/tighter the grain the sharper the needle
-
4. Embroidery thread
-
5. Pencil - often it's easiest to work from a pattern sketched on the fabric
-
Scissors or thread snips
-
-
-
Unscrew the top of the hoop
-
Place the inner hoop underneath your fabric
-
Place the outer hoop on top of the fabric and slip the outer hoop around the inner hoop
-
Tighten the screw so the two hoops fit snug around one another
-
Pull the loose edges of the fabric taught around the hoop
-
Note: the fabric should have a good amount of tension and be completely smooth within the hoops; pull the fabric tight around the hoop but not so tight that the fabric is permanently stretched out
-
-
-
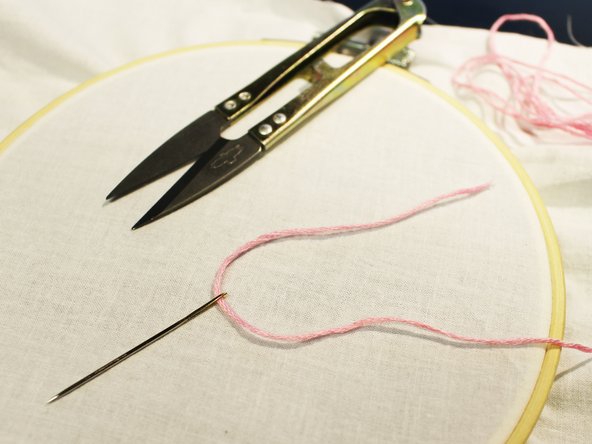
Cut the embroidery thread to your desired length
-
Note: longer pieces of thread can often get tangled and knotted, start off with a shorter piece of thread - you can always add more later
-
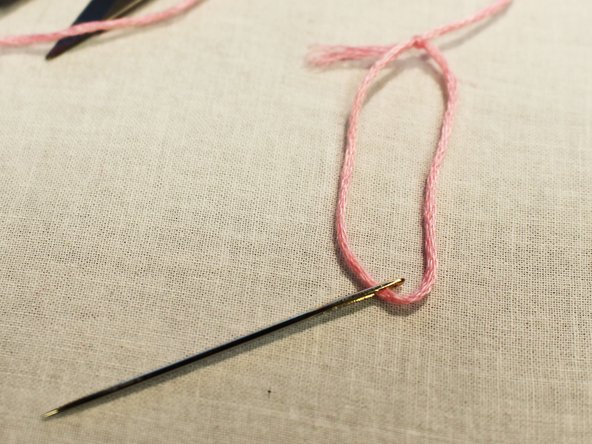
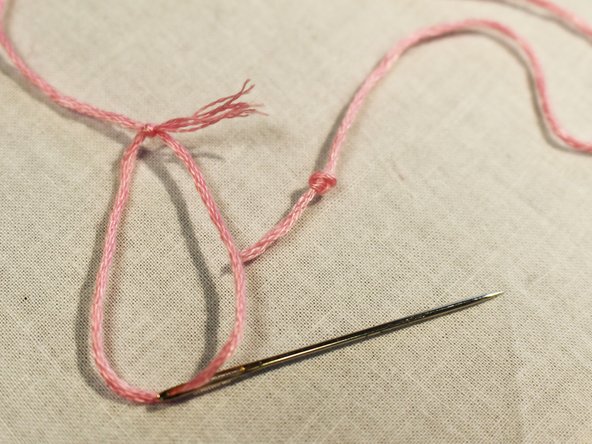
Pull the thread through the eye of the needle and tie the thread in a knot
-
Note: leave some slack between the thread and the eye of the needle - this will minimize the chance of the thread coming unknotted and will keep the holes being made in the fabric smaller
-
Tie a knot or two at the end of the piece of thread to keep it secured against the fabric while embroidering
-
-
-
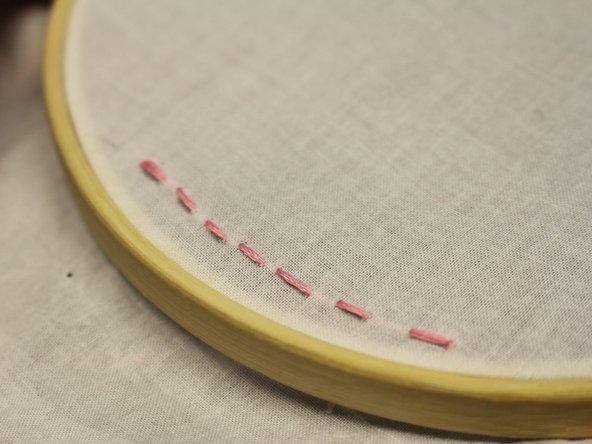
For the purpose of these demos a pattern will be drawn out on the fabric as a visual guide - you can chose how much space is left between each stitch depending on where you place your needle
-
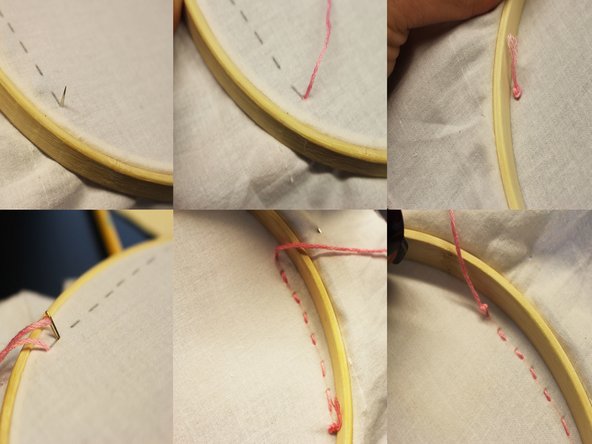
Starting from the back of your fabric, poke the needle up into the fabric at the beginning of the dotted line
-
Pull the needle up through the fabric along with the rest of the thread - you will hear a 'pop' once the needle knot has passed all the way through the fabric
-
From the top of the fabric poke your needle down into the fabric at the end of the dotted line, again pull the needle and thread completely through the fabric
-
Repeat
-
Once you're done with this stitch, tie off the thread with a double knot on the backside of the fabric
-
-
-
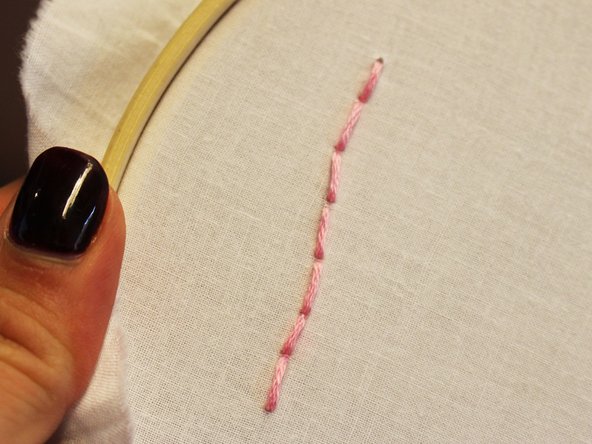
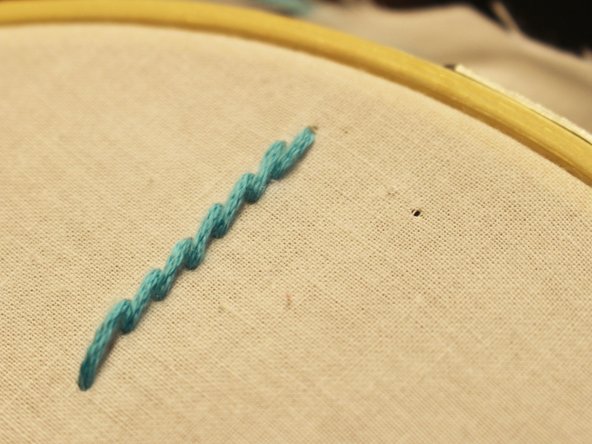
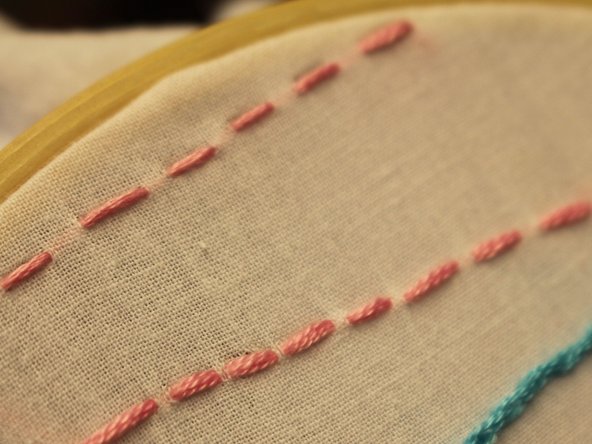
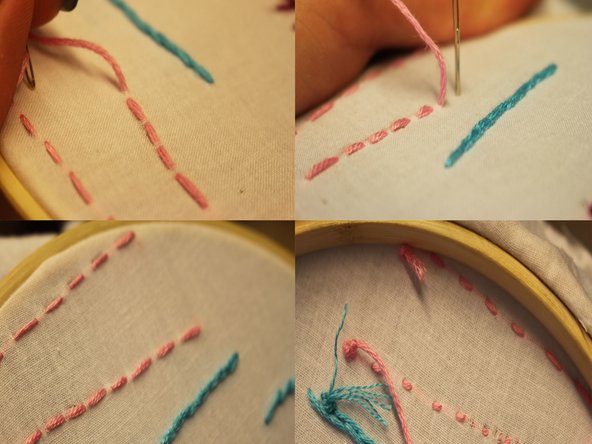
From the back, pull the needle and thread up through the fabric starting a bit ahead of the beginning of the drawn line
-
Pull the needle and thread back down into the fabric, this time starting behind where you just pulled the thread up
-
For the rest of the stitches, pull the needle and thread up through the fabric a bit ahead of the stitch you just made
-
When pulling the needle back down into the fabric place the needle into the spot where the previous stitch started
-
Repeat
-
When complete, double knot the thread at the back of the fabric
-
-
-
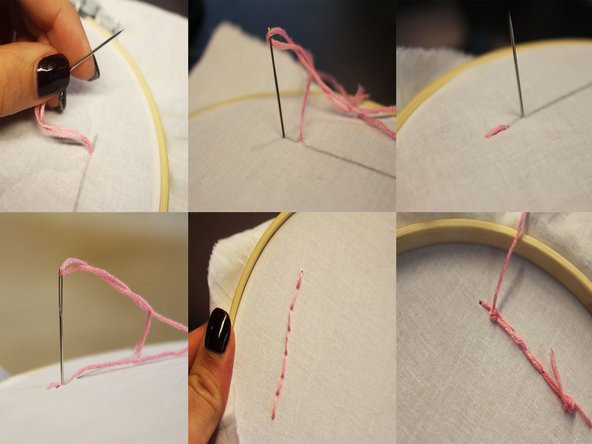
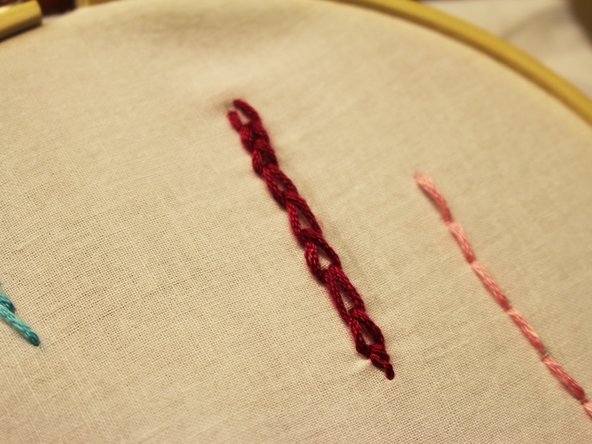
Start by making a back stitch
-
Make another back stitch, this time inserting the needle into the middle of the previous stitch - this should split the thread of the previous stitch
-
Pull needle and thread through the split stitch
-
Repeat
-
Once complete double knot the thread at the back of the fabric
-
-
-
Start by making a back stitch
-
For the next stitch, start next to the middle of the back stitch
-
End this stitch just in front of the back stitch
-
Repeat this stitch, starting just next to the middle of the previous stitch and ending the stitch just in front of the previous stitch
-
When complete, tie off the thread in a double knot at the back of the fabric
-
-
-
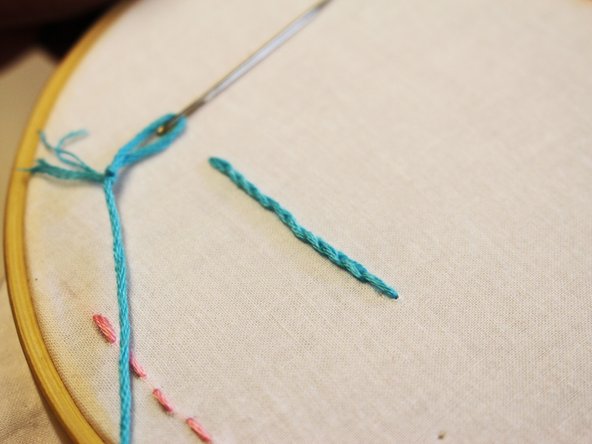
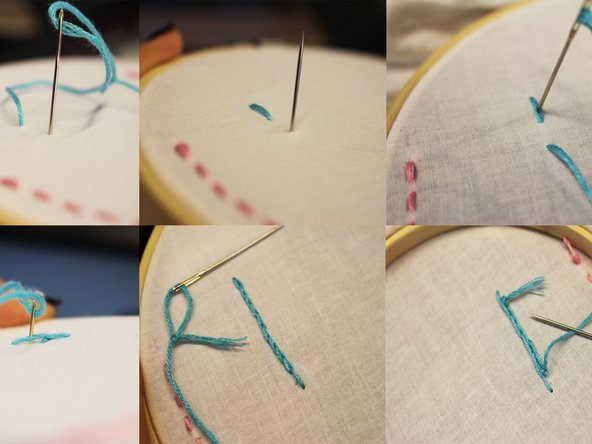
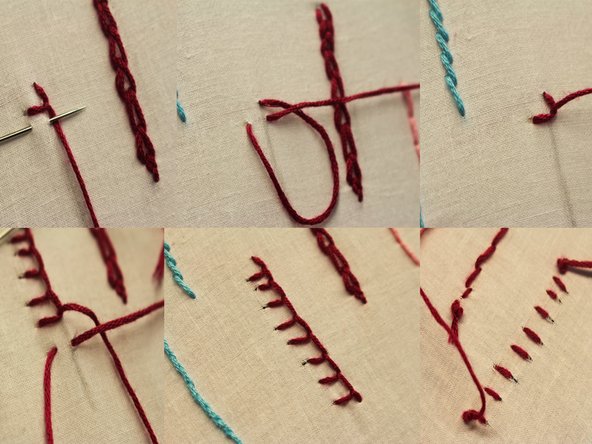
Bring the needle and thread up through the back of the fabric
-
Next to the thread just pulled through, insert the needle back into and then up out of the fabric
-
Continue to pull the needle and thread through, this will create a loop
-
The needle and thread should be running through the middle of the loop with the loop underneath
-
Gently pull the thread to finish off the first chain stitch
-
For the remainder of the stitches, insert the needle next to the thread within the loop - this should be where the thread left off
-
Repeat the process, gently pulling the needle and thread over the hoop that is created and re-inserting the needle within this hoop -- to finish off this stitch insert the needle into the fabric and pull the thread through the back, tie it off with a double knot
-
Note: the further the distance between where you inserted the needle and where it comes back up through the fabric, the larger the chain hoop will be once pulled tight
-
-
-
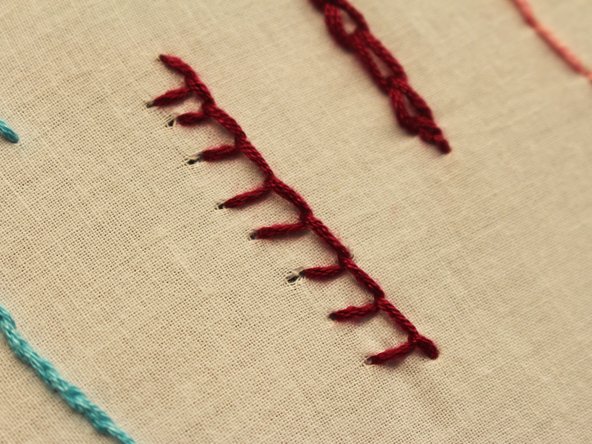
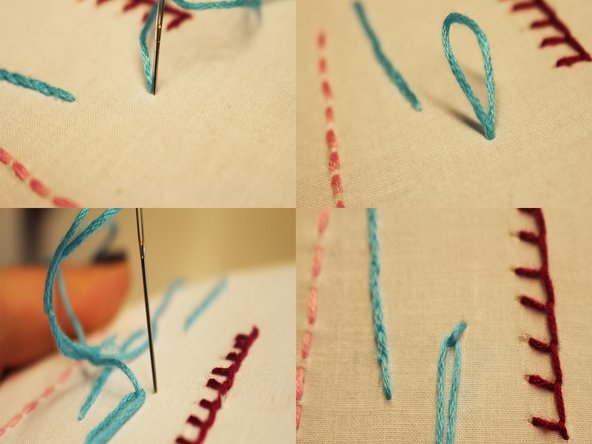
Start by inserting the needle and pulling the thread up through the back of the fabric
-
Next, like the chain stitch, insert needle into and back up through the fabric, this time starting a bit below and to the right of where the thread was just pulled through
-
Make sure the needle rests over the thread
-
Pull the needle and thread through the holes just made - this will make a hoop like shape
-
Continue pulling the thread tight until an 'L' forms
-
Repeat
-
Once complete, insert needle into fabric and pull thread to the back, tie off thread with a double knot
-
-
-
From the back of the fabric, insert needle and pull thread up through the front
-
Insert the needle back through the front of the fabric a bit ahead of where the thread was just pulled through
-
The distance between where you insert the needle and where the thread is pulled up is completely up to you and the design
-
Repeat
-
Once complete, insert needle and pull thread to the back of the fabric, tie off with a double knot
-
-
-
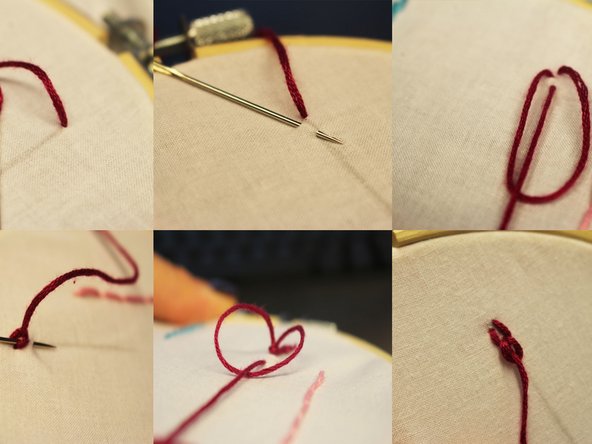
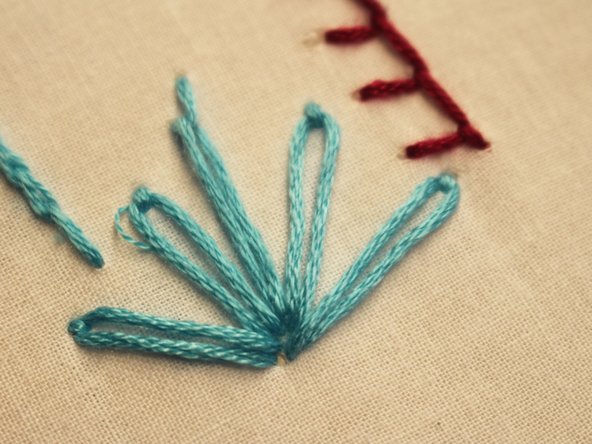
Start by inserting the needle from the back of the fabric and pull the thread all the way through
-
Then, re-insert the needle back into the spot where the thread was just pulled from
-
Gently pull the needle and thread back through the fabric leaving a small loop
-
Next, push the needle up at the top of the loop and pull the thread through
-
Re-insert the needle just outside of the loop and pull the thread back down into the fabric - this will secure the hoop in place
-
Repeat, starting at the same spot where the previous stitch began
-
Once complete, tie off the thread in a double knot at the back of the fabric
-


Yay! You now know the basics of embroidery!
Yay! You now know the basics of embroidery!
Cancel: I did not complete this guide.
One other person completed this guide.
One Comment
Very cool! I heard this is the way to make sew on patches, is that true?
Simon Monley - Resolved on Release Reply