
Tools
Parts
No parts specified.
-
-
Stick the tape to your jeans first! The tape will pick up some of the lint from your pants, it will keep it from being so sticky that it rips the page when you try to take it off
-
Stick it to the work surface You will want the page as close to parallel with the bottom of the table as possible. The edges don't matter! It's ok to have torn or tattered edges, you can fix them later if they bother you.
-
-
-
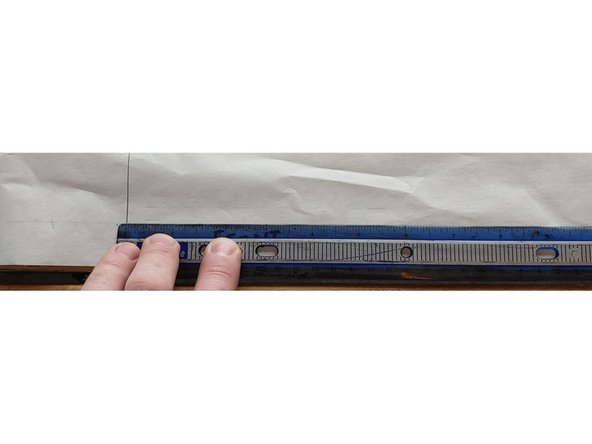
The baseline sets up the rest of your drawings and gives you a point to make your measurements from. In math terms it is y=0. In this case I drew my baseline in blue so it wouldn’t confuse me later on. The blue pencil also won’t erase which is helpful if I make a mistake later on.
-
-
-
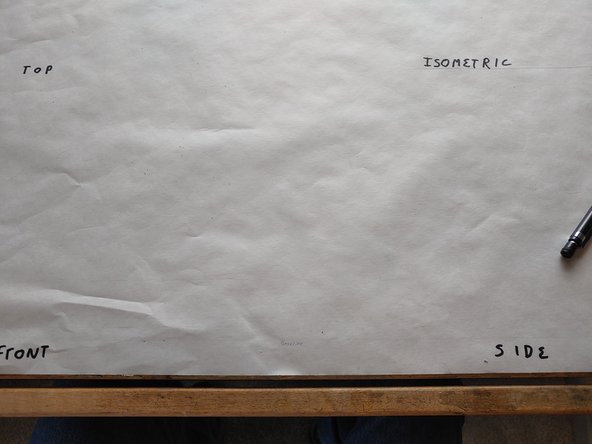
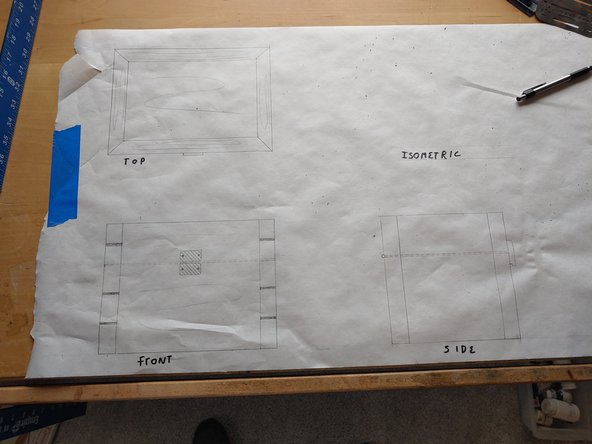
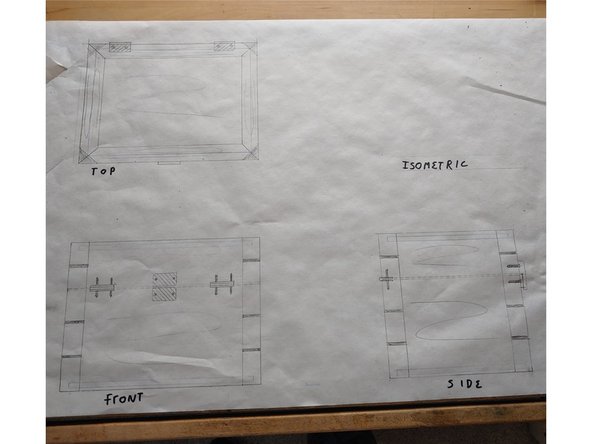
The views are standardized: set up your views as I have here; Top (plan) view at the top left, Front (elevation) directly below it, Side (elevation) to its right and isometric above that. Setting the drawings up this way will save you a lot of time and make them easier for others to read.
-
-
-
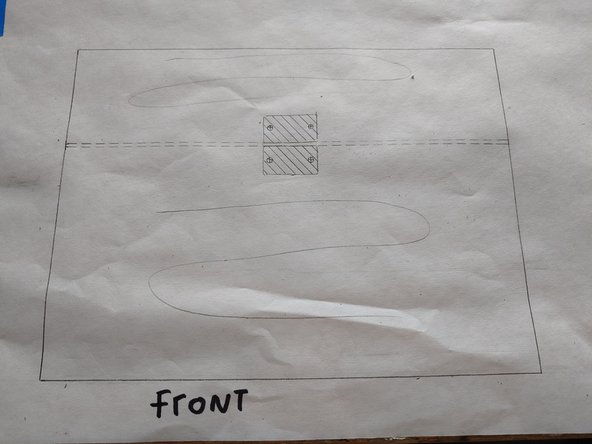
This is where the square starts to pay off. In this tutorial I am doing a set of drawings for a box. Most projects in woodworking are, or at least start out square with a lot of straight cuts. Draw the first vertical line, with the height based off of the baseline. You can then measure your horizontal distance at the baseline.
-
Once you have that measurement you can use the square to lock in the base width, and the top width. Then Just move the square to the bottom of the table and join them together; viola a perfect rectangle with very little effort!
-
I also set up my saw cut since this box will be sawn in two once its assembled I wanted to make sure I was accounting for it in the drawings. I differentiated this from the outlines with a dashed line.
-
-
-
Since you are doing full scale drawings you are now able to check the actual hardware against the size of the box. Or, take your drawing shopping with you!
-
-
-
Grain aligment is critical to building quality wood work. I mark my grain direction with large loose “z” shapes so i can easily verify my choices for joinery and make sure I cut my lumber in the right direction.
-
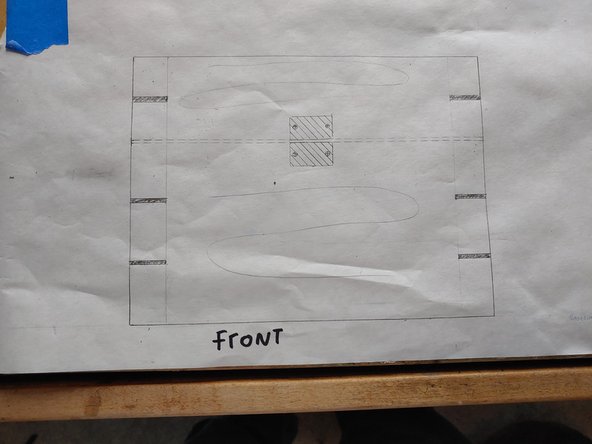
Figure in the thickness of your lumber and put it in your drawings, this will give you the inside dimensions of the box, if you have something your trying to fit inside you can now lay it on the drawing and make sure it will fit!
-
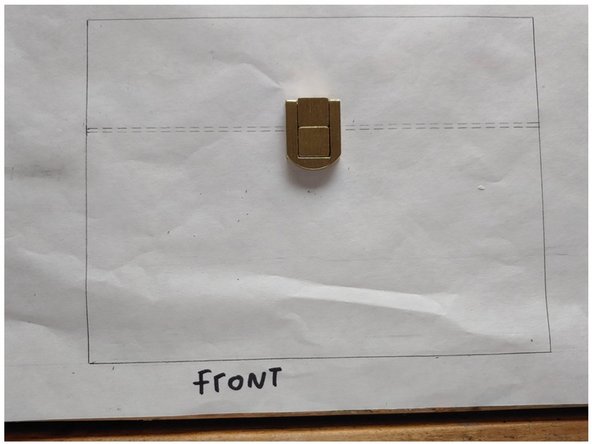
Put every detail you can in the front view, because it will all get transfered via the square to the other faces, it will save you a bunch of time. The front view takes a while, but it makes everything else quick! I added the keys at the last step, I wanted to check the proportion and make sure the number was appealing.
-
-
-
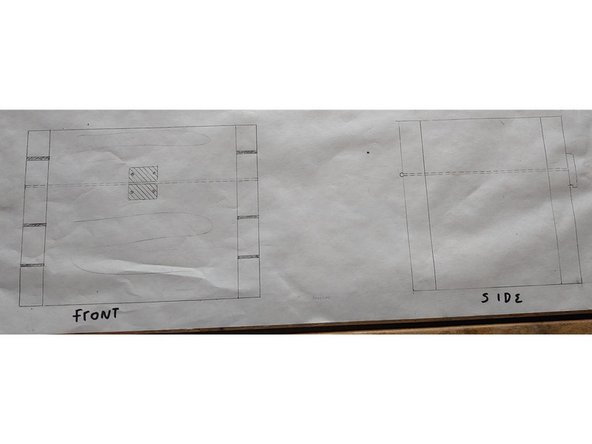
Using the baseline mark the width of your box, then use the square to transfer the height from the front view drawing and trace over the baseline for width between your pencil marks. You can also transfer over saw lines at this time.
-
Use the square off the bottom edge of the table to draw in your vertical lines, and add the board thickness at the same time.
-
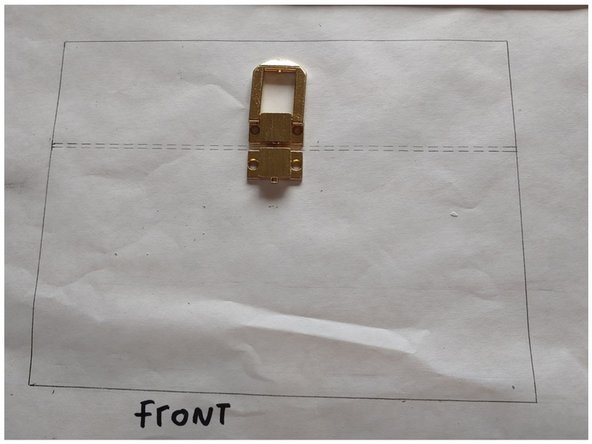
Trace on hardware I traced the hasp on the face, it was at this time that I realized I forgot to position hinges on my front view! I will get them on there though.
-
-
-
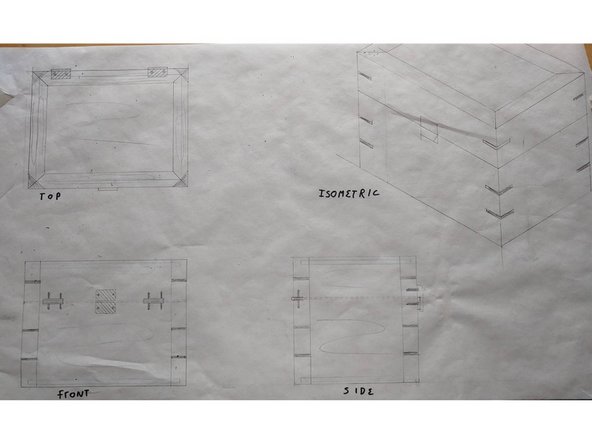
The tecnique is the same as it was for the side view, use the square to transfer as much data as you can. All the measurements you need for this view can be gathered from the two other views!
-
-
-
Add all the information you can about the piece. This is the perfect time to choose your joinery. I am using keyed miters for this box, by transferring the measurements over I can make sure none of the key cuts will protrude into the box.
-
I added my hinges and all of my screws, you can use your actual screws to check length and ensure none of them will pierce through to the inside of the box. Make sure you have all of your grain directions marked.
-
Add any saw cuts that are needed in this case I added blue rectangles that signify where I will be inserting quarter inch plywood that will make the top and bottom of the box. By adding these now I can make sure they wont be interfered with by the keys, and will have adequate material above and below for strength.
-
-
-
By this time you will have created all of the measurements and details needed to make your isometric drawing
-
If you are the one building the item, you may not need this step. If you plan on handing these off to someone else they can be very helpful, If you already have a quality sketch its probably not needed.
-
I should have used a bigger piece of paper Isometrics shouldn't bleed off the sheet.
-


Cancel: I did not complete this guide.
One other person completed this guide.