
Introduction
This guide can be used if you come across an empty roll of filament or if you need to change a roll of filament for whatever reason.
*Updated Firmware
- Updated Extruder Parts
Tools
Parts
No parts specified.
-
-
Dial
-
The nozzle must be hot to properly take out old filament / put in new filament.
-
Click once on the dial to open the menu.
-
Select Control
-
Select Temperature
-
Select Nozzle
-
Turn dial clockwise and select 200° by pressing in on the button.
-
You will be able to see that the temperature was set properly in the top left of the screen.
-
-
-
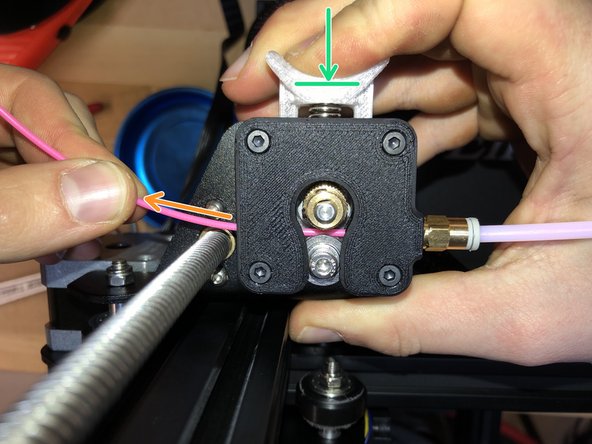
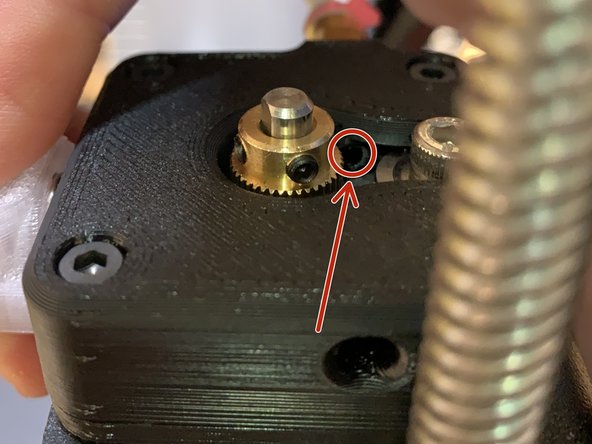
Push in on the spring-loaded extruder.
-
This will make space between the bearing and the extruder gear.
-
Pull filament out of printer from roll side.
-
Removing filament might require a decent amount of force at first to dislodge melted filament near nozzle.
-
-
-
If the last role ran out during a print, there is likely still some leftover filament.
-
You can likely see this filament if you look close enough!!
-
We will want to remove this before inserting more.
-
-
-
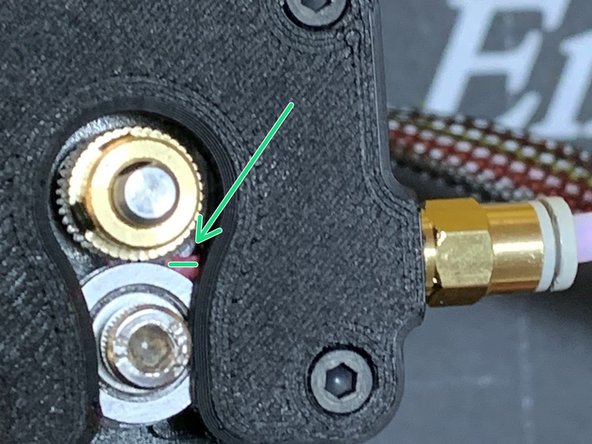
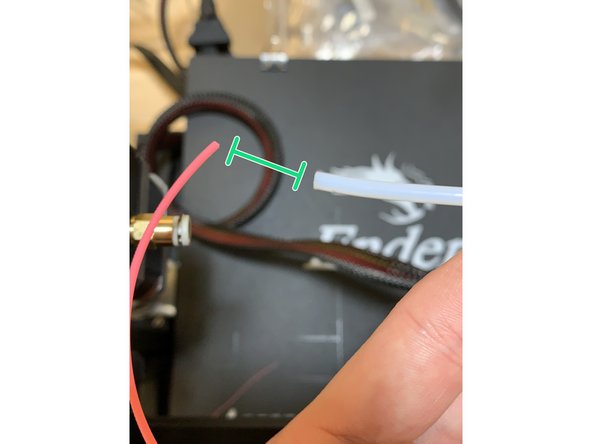
Remove clip from pneumatic fitting.
-
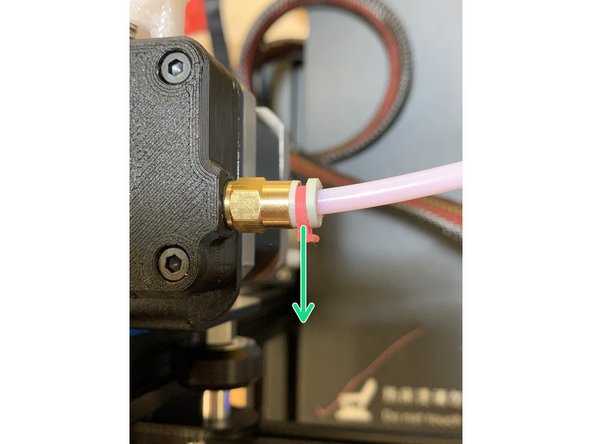
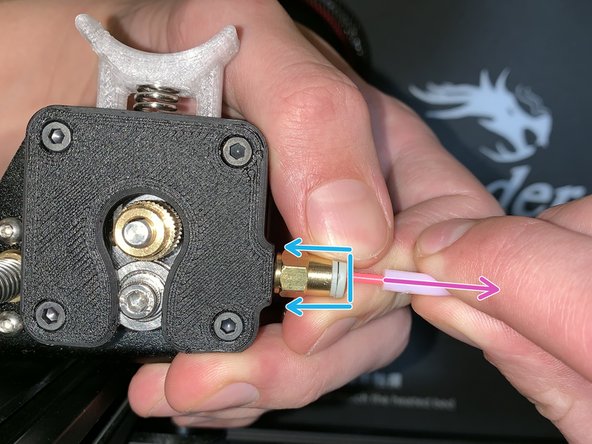
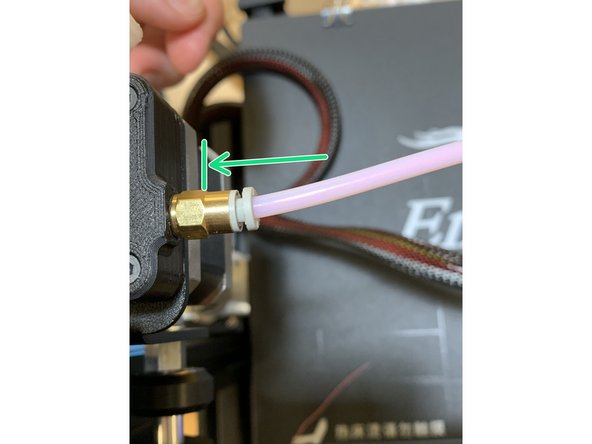
Press back evenly on pneumatic fitting AND...
-
If you are only pressing one side of the fitting, the tube will be extremely difficult to remove and could be ruined in the process.
-
Pull white tube out while fitting is pressed back.
-
-
-
Pull filament out of tube completely.
-
Removing filament might require a decent amount of force at first to dislodge melted filament near nozzle.
-
-
-
Remove filament role from all packaging.
-
Remove tape from filament.
-
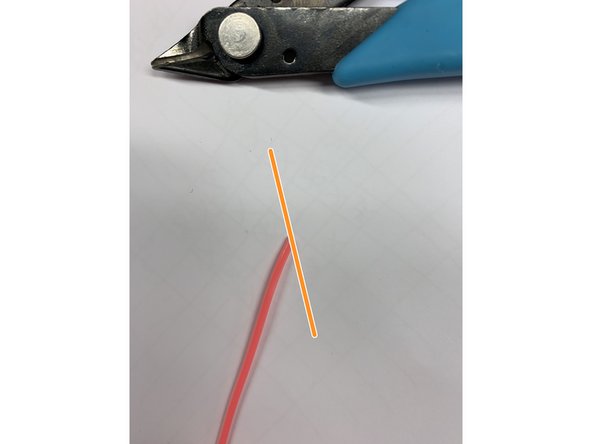
Cut end of new filament at an angle.
-
Bend filament so that the first few inches are straight.
-
This will make life a lot easier when attempting to insert.
-
If available, place filament on roll holder to make the coming steps easier.
-
-
-
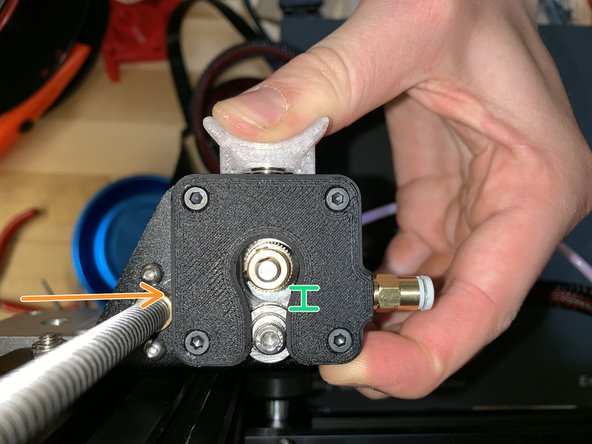
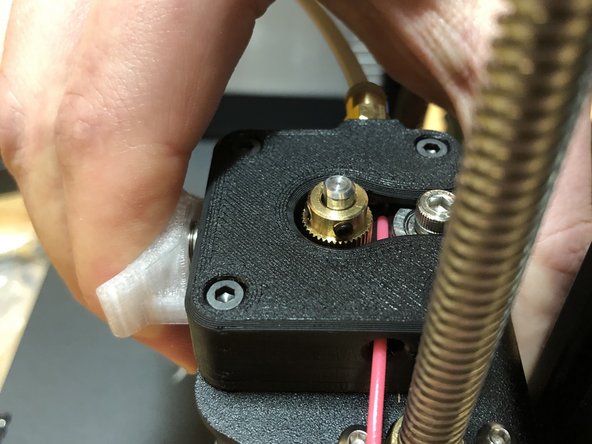
Press back on spring-loaded extruder handle.
-
This will make a gap in between the bearing and the extruder gear.
-
Insert filament from the left side of the extruder mount.
-
It will travel between the bearing and the extruder gear.
-
Push it through the small hole to the right of gear and bearing. This will be the trickiest part.
-
Continue pushing into the white tube until the filament is pressed against the nozzle.
-
If you look closely, you can watch most colors of filament travel through the white tube and towards the nozzle.
-
-
-
Make sure that your nozzle is at least a few centimeters off of the print bed before this step.
-
Click once on the dial to open the menu.
-
Select Prepare.
-
Select Move Axis.
-
Select Extruder.
-
Select 1 mm.
-
Turn dial clockwise and select ~20 mm by pressing in on the dial.
-
-
-
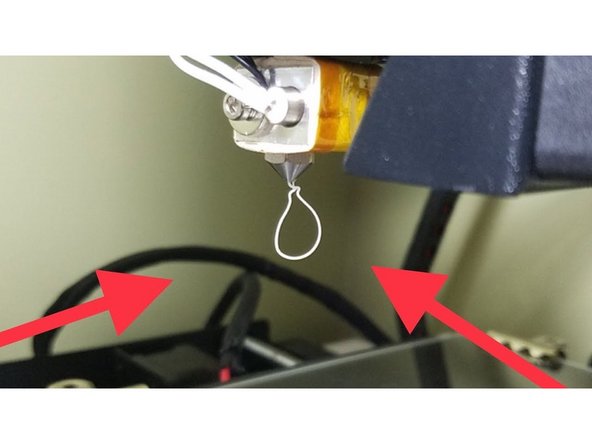
Your filament is clean and straight! Start your print.
-
Your filament is curling. Check out the blocked nozzle section of our 3D Printer Maintenance Practices.
-
If the previous color does not fully purge.
-
You may just have more filament left in the hottend. Just keep feeding material through.
-
You might have to disassemble the hottend to remove a gap between the PTFE (or heat break) and the nozzle inside of the heater block. Properly reassemble the hottend as shown here.
-


New filament should be loaded
New filament should be loaded
Cancel: I did not complete this guide.
One other person completed this guide.