
Featured Document
-
-
The major elements of the software interface are identified below.
-
Reference this image often.
-
-
-
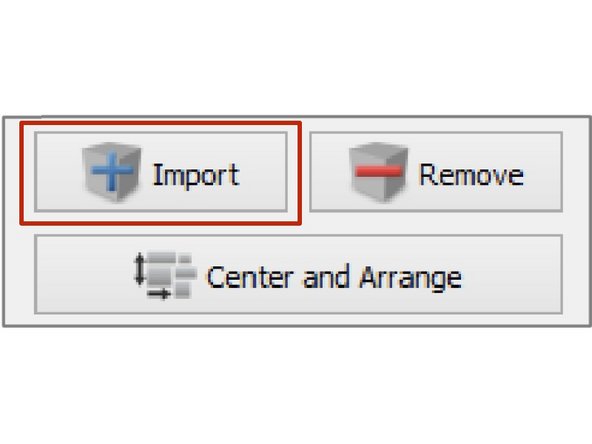
Click Import below the Models section and navigate to the folder where you saved your STL file.
-
You can also drag-and-drop file(s) into the Build Table
-
-
-
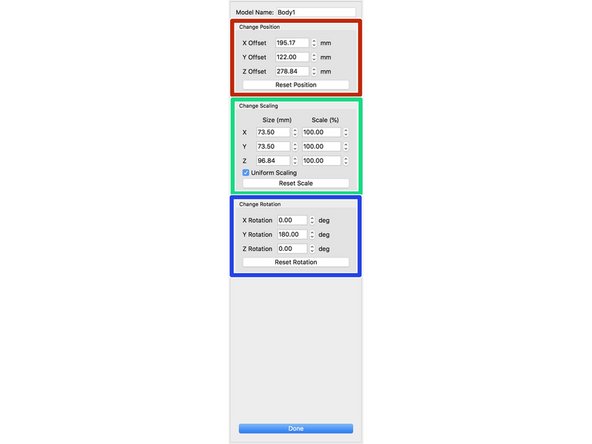
Double click on your Model
-
The Model Menu will pop up. Adjust as needed.
-
Position Adjustment
-
Sizing Adjustment
-
Rotation/Orientation Adjustment
-
You can also use the Top 4 Buttons in the Tool Bar
-
-
-
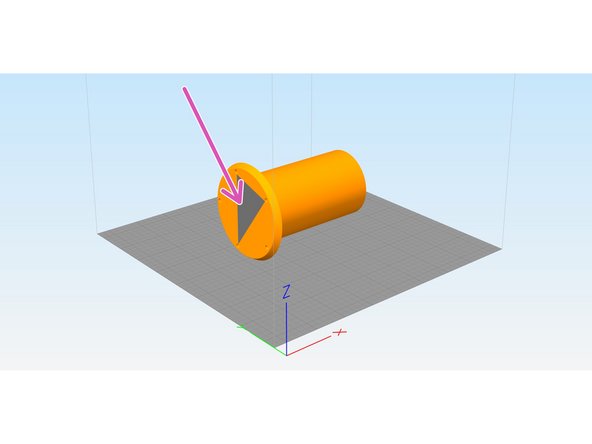
Make sure a large flat surface is in contact and flat with the Build Table.
-
Go to EDIT then Place Surface on Bed
-
CTRL - L is the keyboard shortcut
-
Click on the surface you want on the bottom.
-
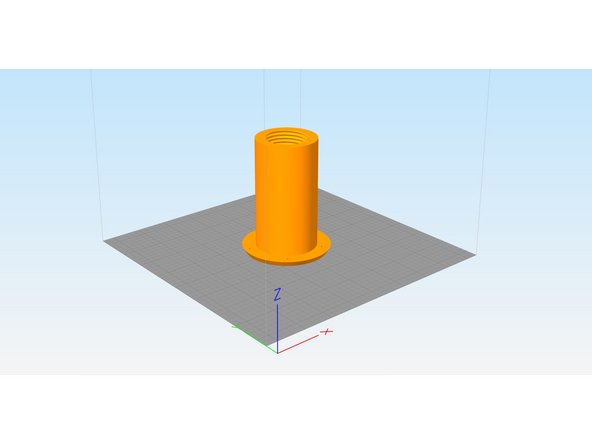
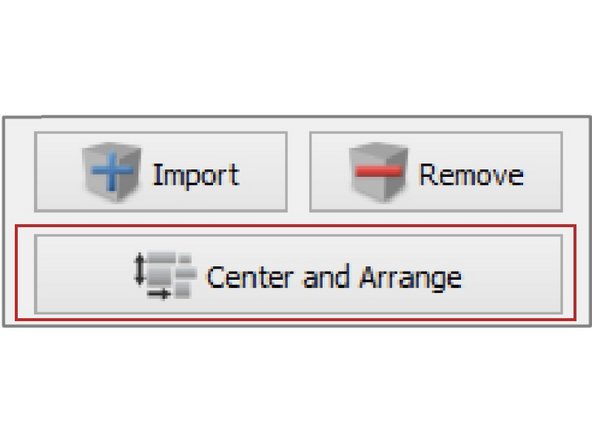
Press Center and Arrange below the Model Section
-
-
-
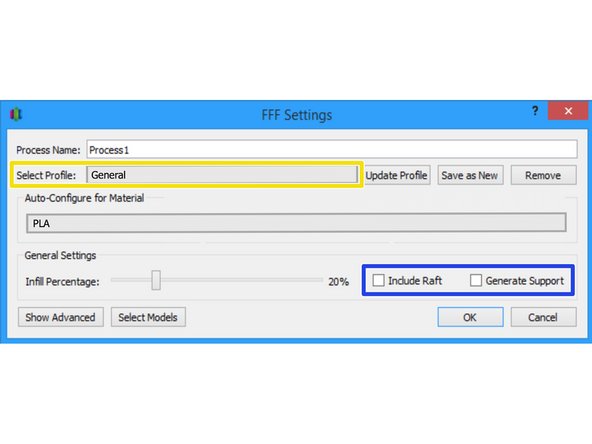
DO NOT OPEN OR ADJUST ANY SETTINGS
-
DO NOT USE THE DEFAULT PROFILE
-
Most models use a single process.
-
More complicated models may use multiple processes.
-
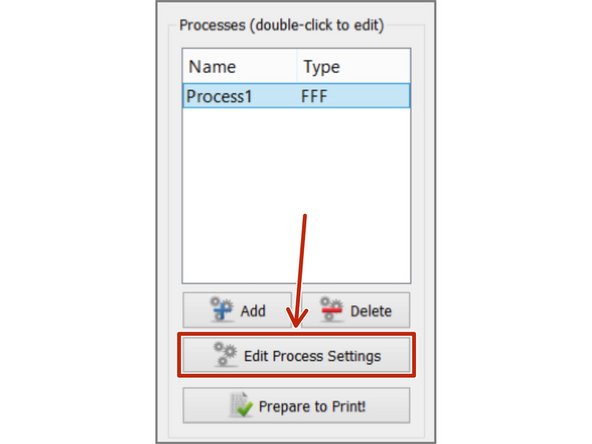
To make adjustments to your Process, double-click on the Process or click Edit Process Settings. This will open the FFF Settings window
-
Select Profile: Loads a printer profile and the corresponding settings, which have been selected to ensure optimum quality. Click HERE for profile descriptions
-
-
-
-
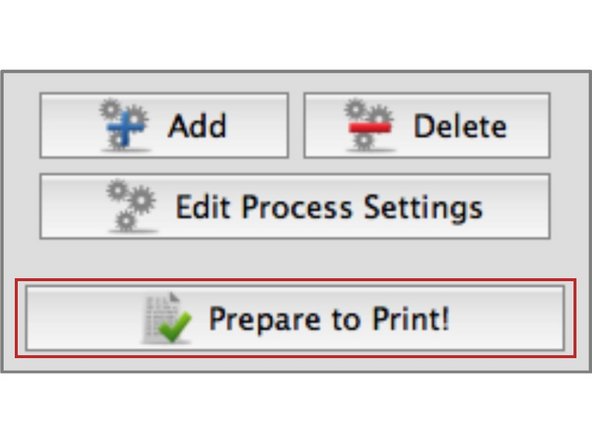
Press Prepare to Print.
-
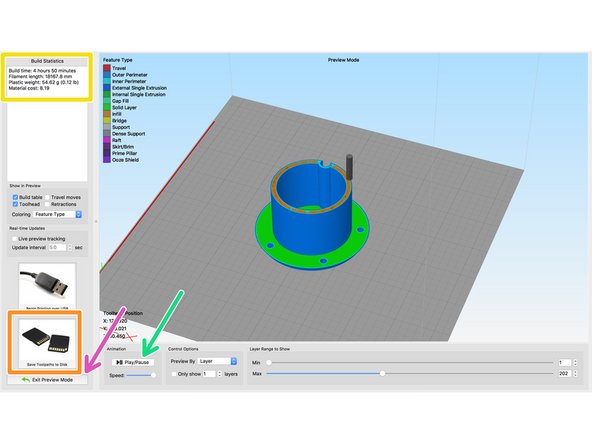
Model Statics are located in the top left corner
-
To preview print simulation press Play
-
Press Exit Preview Mode to go back to model preparation.
-
press the Save Toolpaths to Disk button to save your part to be printed.
-
Build Time: How long it would take for your print to finish. Filament Length: How much filament it will take to build your model. Weight: How much the print will weigh when completed. Material Cost: An approximation of how much it will cost to make your part.
-


When done with this guide, you should have a light understanding of the different settings available to you.
When done with this guide, you should have a light understanding of the different settings available to you.