
Difficulty
Moderate
Steps
7
Time Required
00:20:00
- How to Use Juki Sewing Machine 7 steps

User-Contributed Guide
This guide is not managed by the site's staff.
Quiz
0
Introduction
There are guide that help set up the threading of the Juki sewing machine but this guide will help with the step after that, working the machine. Using the machine after preparations from previous guide will be shown here. Make sure to check the Bobbin and Threading guides before. Ask facilitators for help if this guide is confusing.
-
-
Behind the machine there is a lever that can be pushed up or down. This is to lower the presser foot to allow more space around the needle. Lower to allow more space.
-
-
-
Below the table, there should be a knee lifter on the right. This lever is to create space so that the fabric can slide up the clamp and be directly under the needle.
-
-
-
Press knee on the knee lifter and use the knob on the right side to let space in so that the fabric can be inserted in.
-
-
-
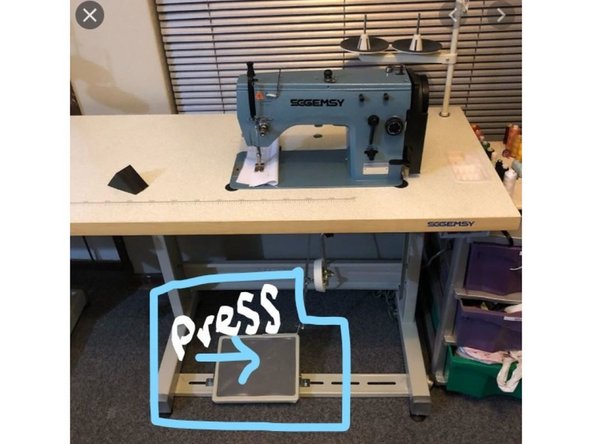
On the floor under the machine there is the foot presser. The rectangular button will activate the machine and start sewing the fabric under the needle. The more pressure the faster the needle will puncture the fabric.
-
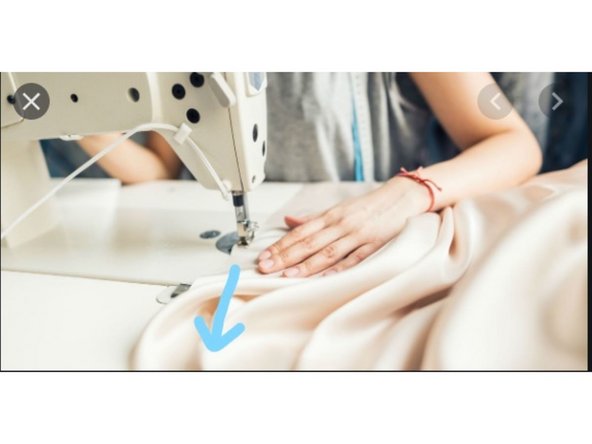
As the needle is going in and out of the fabric make sure the fabric is being pushed up away from the front going at a speed depending on the pressure of the foot on the presser. Do this as much as needed.
-
-
-
There might be some problems while sewing but they are easy to fix. When the fabric is not being moved as fast as the needle is puncturing the fabric it can become tangled and cluttered up.
-
Reset by lifting the needle and removing the fabric by lifting the clamp using the knee lifter and cut the unnecessary threading and restart. The bobbin might need adjusting as well.
-
-
-
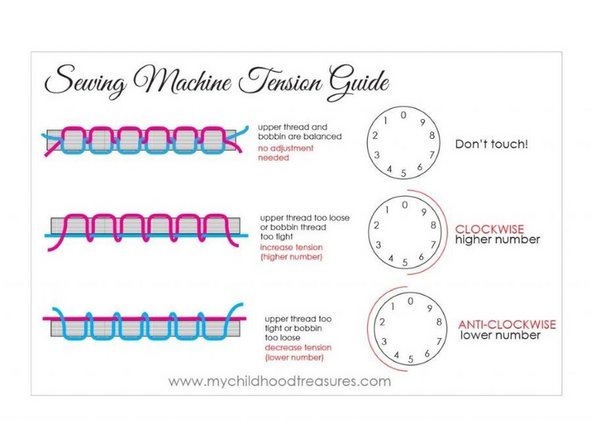
In order to have the right threading in order to be secure is to make sure there is enough tension.
-
-
-
Pull the fabric with the thread away from the machine and cut a few inches off the thread connecting the excess thread to the fabric and tie accordingly to ensure the thread does not fall out and keep whatever project intact.
-


Cancel: I did not complete this guide.
One other person completed this guide.