Introduction
Print failed?
No problem!
This guide will help you learn why your print may have failed and how to get it up and running again! It covers some of the most common problems we run into with prints and their solutions.
If you're still having trouble, find one the lab facilitators or maintenance team members. We're happy to help!
-
-
When the printer starts depositing material, the layers should be roughly the same height and width all the way around your print. A small amount of variation is acceptable, but all layers should generally be "pancake" shaped, flat on top with rounded edges, signifying a good layer height.
-
Note: You can only tell this by watching the first layer of the print! Always check the first few lines before leaving, it greatly reduces the risk of your print failing as soon as you walk away.
-
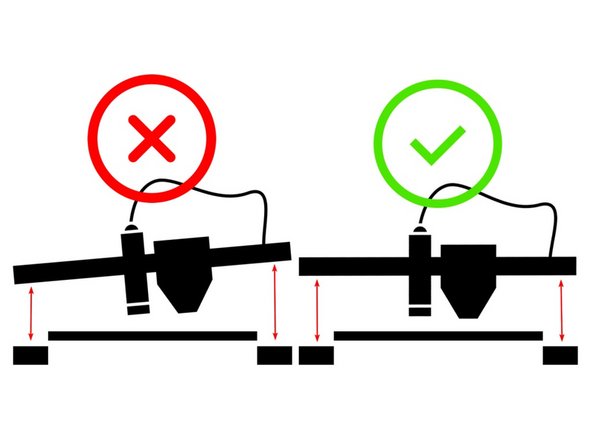
Check The Shape of Your Layers: Layers should not be rounded on top, signifying the nozzle is too far from the bed at that corner. If they are scattered, or the nozzle is scratching the bed, the nozzle is too close to the bed. Run your finger over the layers to make sure they are stuck to the bed.
-
-
-
Peel off the magnetic bed and wash it in the sink with soap and water. This will remove any oils from the bed and allow for better adhesion. Dry completely and place it back on the printer (text up and facing you).
-
-
-
Bed leveling means checking the distance between the nozzle and the bed at different points of the bed. Always check that the bed is level before starting a print, it will help with adhesion and layer height issues.
-
There are two ways to level the bed, depending on your printer's configuration:
-
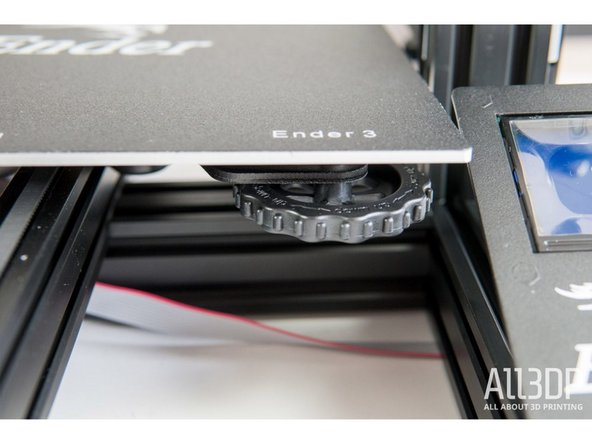
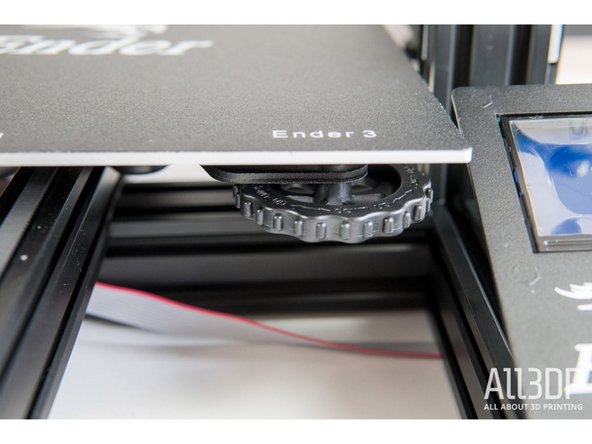
Manual Leveling Check the underside of your printer. If your printer has a set of four wheels, it can be adjusted manually. These adjust the bed height at the four corners.
-
Z-axis Control Leveling: If your printer has no wheels underneath, it must be leveled via Z-axis Control Leveling.
-
-
-
If your printer has wheels underneath, it can be manually leveled.
-
Navigate through the click wheel menu to Menu->Prepare-> Level Corners. This will bring it to the first quadrant, the front left.
-
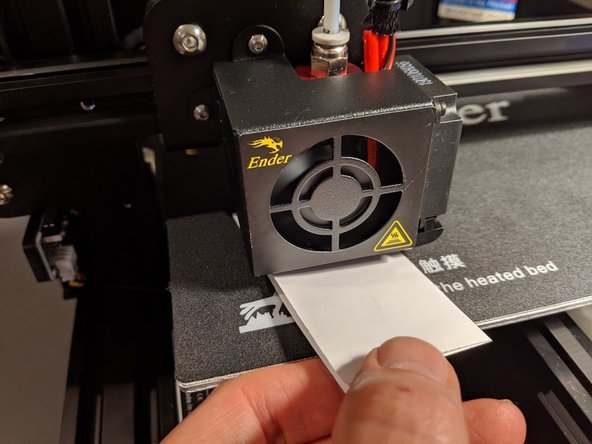
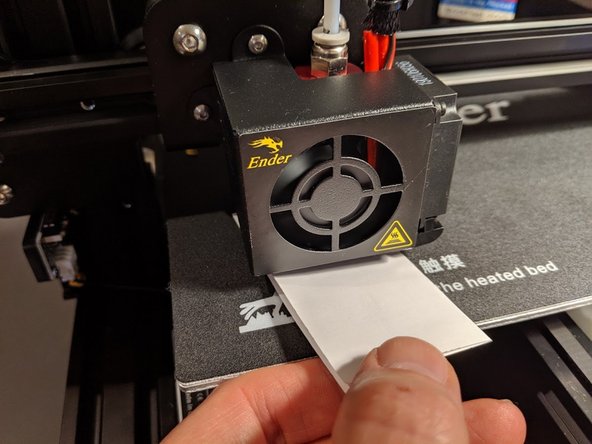
The suggested layer height is about a receipt’s width. Slide a receipt under the nozzle and adjust the wheel until a receipt can pass under the nozzle with light to moderate resistance.
-
Repeat this step for all four corners.
-
-
-
If your printer has no wheels underneath it, it can be leveled using Z-axis control leveling
-
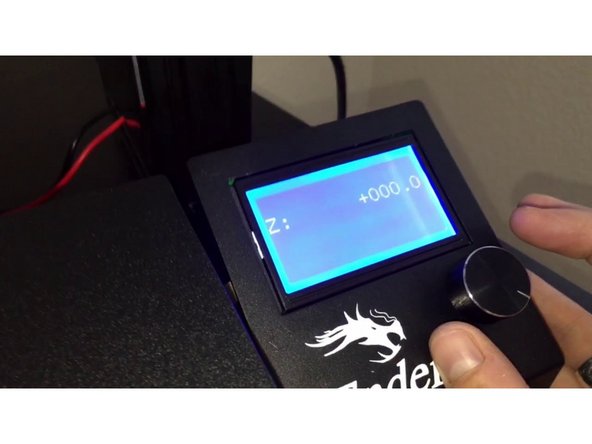
Navigate to Level Corners on the clickwheel menu: Prepare->Bed Leveling->Level Corners. This will bring the nozzle to the first of five points on the bed, the front left corner.
-
Check that a receipt can slide between the nozzle and the bed with slight resistance. Turn the wheel left or right to raise and lower the nozzle.
-
Click the click wheel in to move to the next point.
-
Repeat these steps for all four corners and center positions. TA-DA! The bed is level!
-
If you're still having trouble, find one of our awesome facilitators! They're happy to help.
-
-
-
Occasionally prints will fail due to a problem in the settings in the slicing program, Simplify3D. Many people change them and they can get carried over to the next person's print.
-
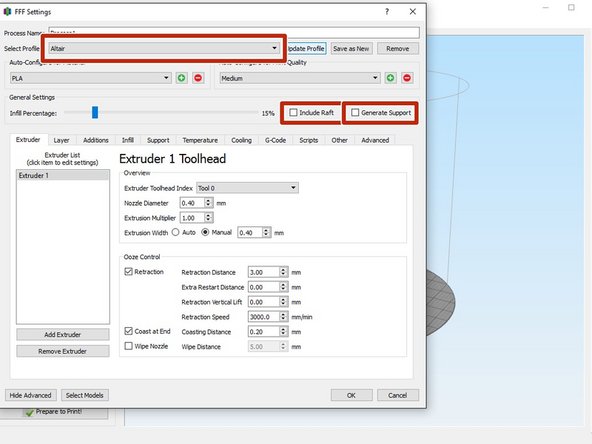
Check that you are using the right profile for your print: Pick a profile that matches what you need out of your print. These profiles have been tailored to match the requirements of most designs. The most frequently used profiles are "High Strength", "Detailed", and "Vase".
-
Note: Avoid using the "Default" print setting! It is a preloaded default that cannot be deleted, and it's awful. It will assuredly cause your print to fail.
-
Supports: Portions of prints that hang over at angles greater than 45 degrees must have supports underneath them to prevent them from falling into midair. Check the box at the top of the menu to automatically generate supports for your print.
-
Rafts: A raft is a large base layer which your print will sit on top of. They can improve the quality of your prints by increasing bed adhesion and stability. They are recommended for any print that is tall or has failed several times. Check the box at the top of the menu to automatically generate a raft for your print.
-
If your print fails after checking these settings, please notify a facilitator or team member. The profile settings may needed to be reset.
-
-
-
Some prints fail because of errors in the design. Some can be caused by assumptions made by the programs they were designed in. Here are a few common design problems and how to fix them:
-
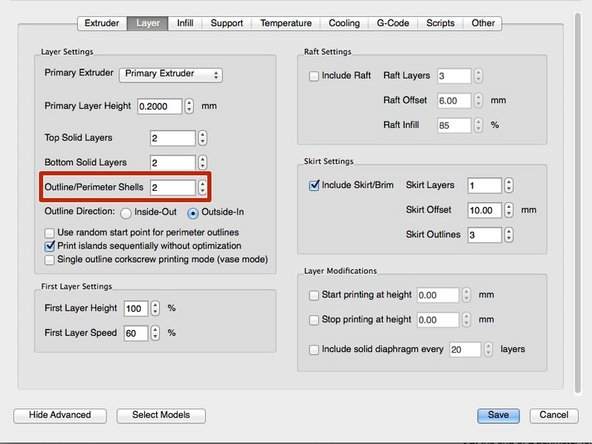
Too few/thin walls: If the surfaces of your design are extremely thin, Simplify3D will interpret them as a single wall structure, or even not recognize them. This can be fixed in the program you designed it in or by increasing the number in the "Outline/Perimeter Shells" setting in Simplify3D.
-
Details are below print resolution: If some of the details of your print are missing, they may be below the resolution of the printer. They can be fixed by adjusting the "layer height" setting in Simplify 3D or by scaling up the size of your print.
-
-
-
If you have gone through these and your print still hasn't come out, or if you're stuck on a part of the guide, please don't hesitate to find one of our helpful team members. We love helping out on people's projects, that's why we're here!
-
-
-
Try these tricks and give it another go. We've seen a lot of prints that failed at first come out great. Sometimes it's a quick fix and then you're back on track!
-


