Difficulty
Easy
Steps
4
Time Required
00:05:00

In Progress
This guide is currently being written. Reload periodically to see the latest changes.

User-Contributed Guide
This guide is not managed by the site's staff.
Introduction
In the innovation lab, a Juki sewing station is available and this guide should explain step by step how to properly and efficiently use this machine. Before jumping in, make sure to keep the area clean and if there are steps in the guide that do not make sense there is a similar guide that can help, "How to Thread the Juki Machine ". There are also facilitators that can help.
-
-
Equipment needed before threading are Nylon thread , correct fitting needle that inserts into the machine , light attached , bobin in and threaded (SEE BOBIN GUIDE)
-
-
-
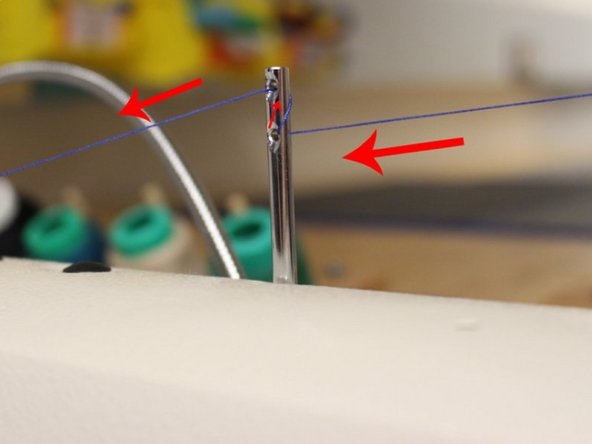
On the arm, there is a hole at the very tip on the far left. Insert the thread from the back to the front of the hole toward the user.
-
-
-
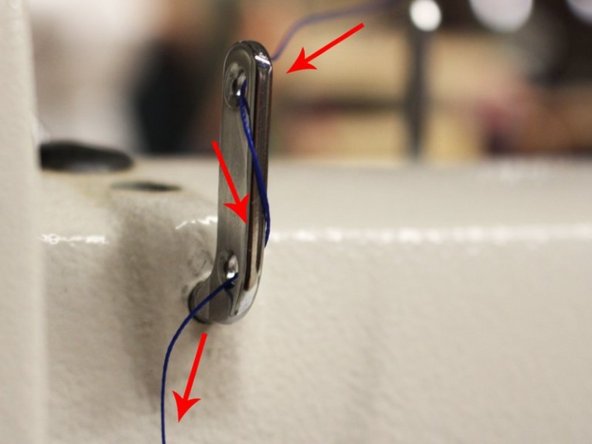
There are two silver thread holders on the top of the machine and the first one is the back side sticking up with two holes. The thread should be inserted through the bottom hole from the back to the front. Then, go back around to the back again and insert the thread on the top hole again back to the front.
-
The second thread holder is located at the front and also has two holes but is smaller. Pull the thread in the first step from the right to the left of the top hole of the holder. After, wrap the thread to the right side of the bottom hole and pull it through the left again.
-
-
-
At the bottom left of the, there is a knob and a few silver hooks surrounding it. Wrap the thread from right to left in a clockwise motion so the thread wraps the bottom of the knob.
-
Pull the thread through two silver hooks to the left and then push the thread to the top hook and pull it through.
-