
Introduction
This guide will show you how to correctly wind and set the bobbin into the Juki Sewing Machine.
Using the wrong bobbin type and/or incorrectly setting the bobbin will cause machine malfunction.
Before you start, if you are unfamiliar with the anatomy of the Juki machine take a look here to get yourself acquainted!
-
-
The correct bobbin for the Juki Sewing Machine should measure .83 inches in diameter
-
The inner circle of the bobbin should measure .23 inches in diameter
-
You can check the size by using a caliper.
-
-
-
Insert thread through the back of the first thread arm hole
-
Insert thread through the back of the thread guide located above the bobbin tension wheel
-
Pull thread around the underside of the bobbin tension wheel towards front of machine
-
**The amount of tension on the thread is very important! The thread should not be loose in the bobbin tensioner but not completely immobile within the tensioner -- you should be able to pull the thread with little effort while still feeling some pressure from the tensioner
-
-
-
Insert end of thread into any outer hole of the bobbin and wrap around bobbin counterclockwise a few times
-
Push bobbin onto the bobbin winding pin
-
**Make sure the machine is not threaded and the foot is lifted
-
-
-
Push the bobbin winding mechanism forward, towards the back of the machine, to set the machine into bobbin winding mode
-
Press on the foot pedal to begin winding the bobbin
-
Once the bobbin is full, the bobbin winding mechanism will automatically snap back into its resting position - taking the machine out of bobbin winding mode
-
Cut thread and remove bobbin
-
-
-
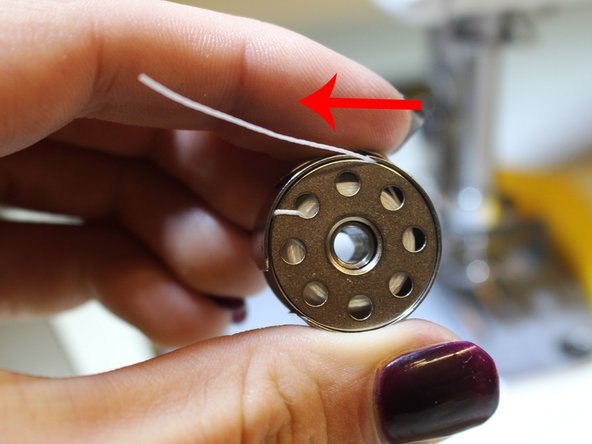
Insert bobbin into the bobbin case so the thread pulls towards the left in a counterclockwise direction (C in the diagram)
-
Pull thread up through the metal slit at the top of the bobbin case (A in the diagram)
-
Gently pull thread to the left until it clicks underneath the small metal latch above hole (B in the diagram)
-
-
-
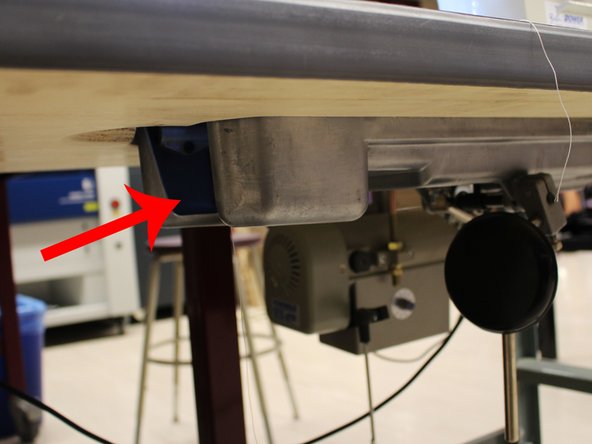
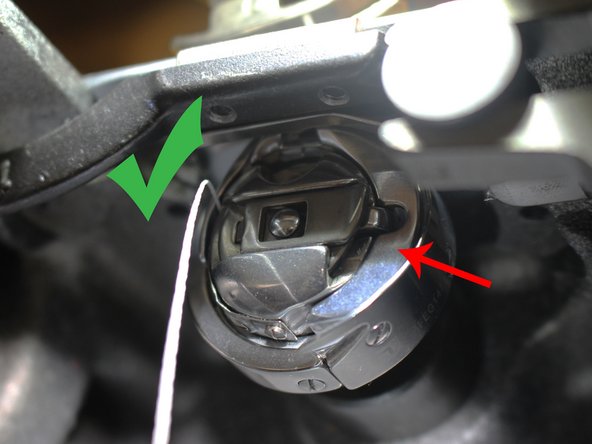
Insert the bobbin casing into the bobbin holder underneath the machine
-
You will know the bobbin casing is correctly inserted once it clicks into place
-
Check out this guide on how to thread the Juki Sewing Machine
-


Once you have inserted the bobbin correctly and threaded the machine the Juki Sewing Machine is ready to use!
Once you have inserted the bobbin correctly and threaded the machine the Juki Sewing Machine is ready to use!
Cancel: I did not complete this guide.
One other person completed this guide.