-
-
Wood gouges: These are much like chisels but they blades will be curved. The curve allows you to match the profile you want to leave in the wood.
-
-
-
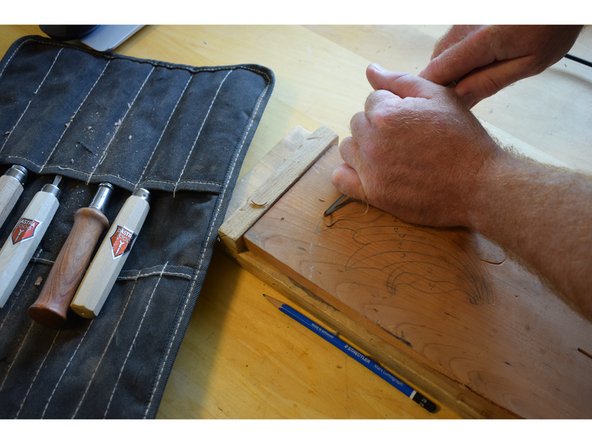
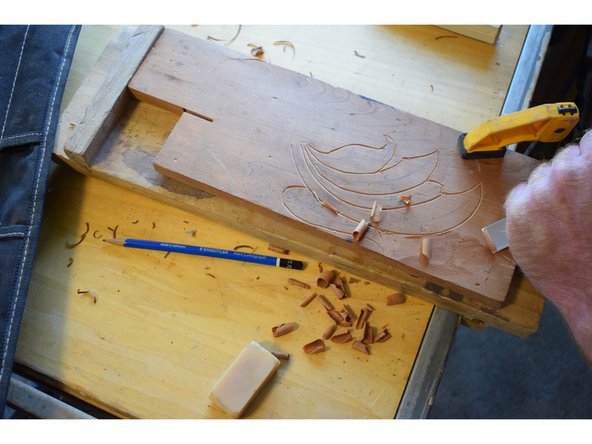
Make sure the wood is supported by something! In this case I am using a bench hook, but you could use clamps, a vice, grippy cabinet liner or whatever else. The wood must be stable!
-
Grasp the chisel with BOTH hands as shown. This ensures your hands are never in harms way. Gouges are sharpened to a razors edge so never carve towards yourself, ensure no part of your body is ever in front of the tool. This also gives you the best leverage over the tool.
-
-
-
Most any wood can be carved, but some are easier than others and some can take more detail than others. In general you want a hardwood,.
-
Basswood, Mahogony, Cherry, Butternut, Walnut, Oak and maple are all common choices. They are about the right hardness and this will give you some color and texture choices to start. If you aren't sure about your species test it out, or go to wooddatabase and read up on it.
-
Basswood is a great wood to start, widely available and easy to carve.
-
-
-
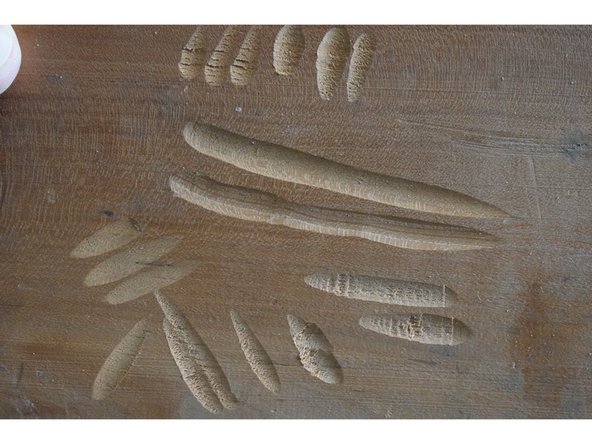
In the first picture you can see the results of a few cuts in different directions on a sample piece of wood. Look how the wood reacts to being cut.
-
The two long cuts in the center are made going the same direction. The difference between them is how sharp the gouge was. The lower one was with a gouge that had some edge damage and was getting dull. The upper cut was with a fresh honing. Look at how much better the control and finish is with the sharp gouge.
-
The other cuts are all with the same, freshly sharpened gouge. Look at how the change in direction has changed the finish in the cut. In the cuts on the diagonal one half of the cut is pristine and the other is riddled with tearout. Take some time to understand why this is happening.
-
This is a great time to explore what textures you can make, and what it takes to make a smooth finish.
-
-
-
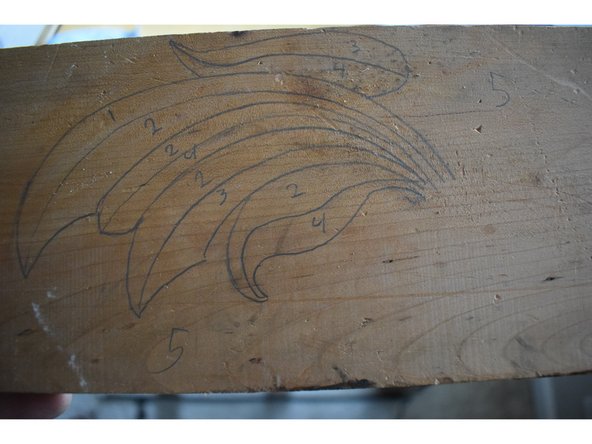
The first step is to draw out the thing you want to carve. You can draw directly on the wood or use carbon paper to trace a drawing. Whatever you use ensure your lines are really vivid and easy to see
-
Set your "levels". Thing of your design like a topo map. In the second photo I have written numbers on each part of the piece. In this case I have used the numbers 1-5 to indicate where I am going with the piece.
-
Each layer (1 being the top layer) will be .05" deeper than the last. The first layer will be 0"-.05", and the 5th layer will be 0.20"-0.25" deep.
-
-
-
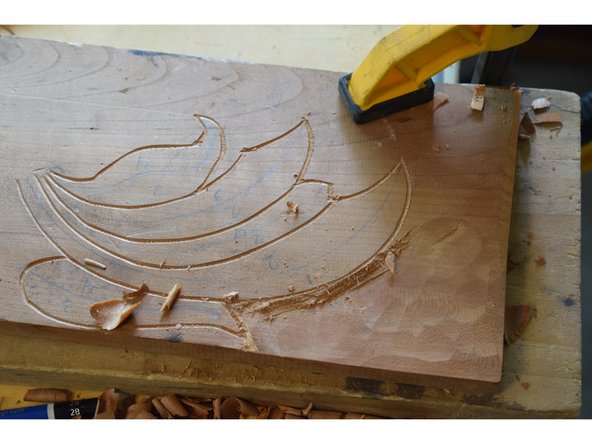
Start out with a small "u" gouge, follow your outline. Cut the low parts of your outline in. This will give you an easy to see outline to start.
-
I added a clamp to my work because it was moving on me a little
-
Strop and hone your gouges as needed. Sharp tools are important to getting a good finish and take less effort to operate.
-
-
-
Use a broad gouge with a shallow curve and start roughing in the deepest part, in my case this is the background
-
Give yourself some space around your outline, it is easy to go a little to far and cut something you don't mean to. We will clean it up in the next step.
-
-
-
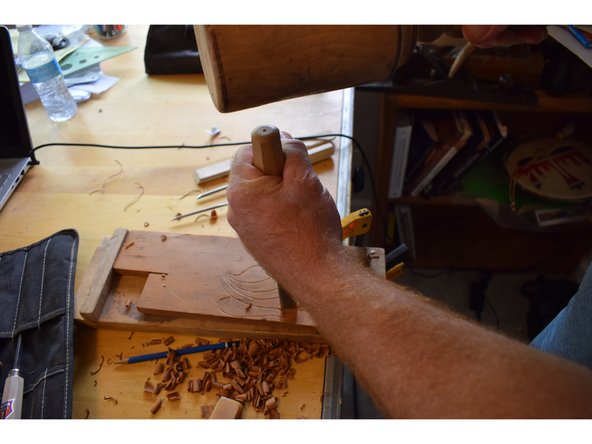
Find a gouge that matches your outline as closely as possible.
-
Set it in place and give it a single rap with the mallet. A single hit will be more accurate than multiple and you don't want to go so deep that you end up splitting the piece.
-
Use this same tecnique all around the section you are working with. You may have to use a few different gouges to get the lines nice.
-
-
-
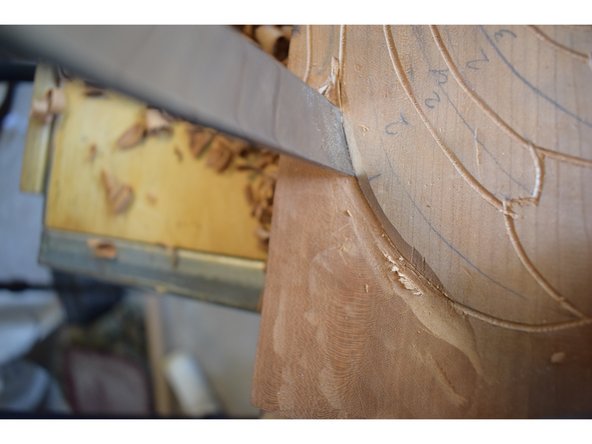
Find a gouge who's inner profile matches the shape you want, use the inner profile to round the edge how you desire.
-
Once you have the edge rounded in, carefully use the shallow gouge to cut in to the line you cut with the hammer and gouge.
-
You will end up with a nice, finished edge that will be resistant to dings and tear out.
-
-
-
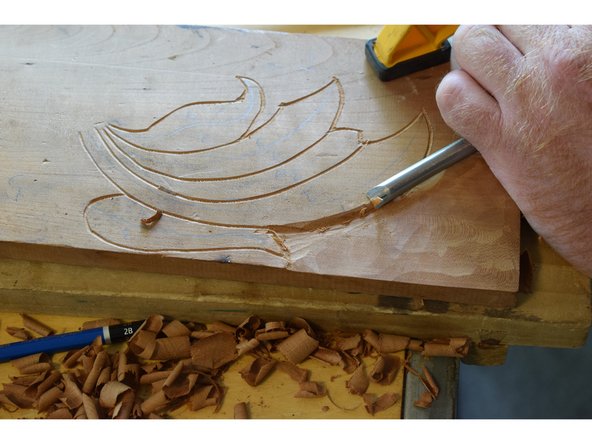
Find a gouge who's curvature you like. Cut in right next to the line that marks the high point (try to leave the line in tact, this line is right next to a "1" so it is the highest point on the relief)
-
Blend this high point into the low point as you see fit.
-
Now you can add texture or work towards smoothness, depending on what you are going for.
-
You will repeat the process for every level, make sure and keep track of what is a high point and low point!
-
-
-
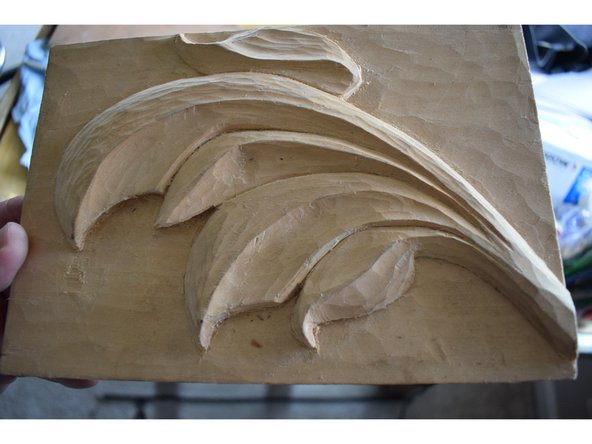
This is an earlier carving, but this one will end up very similar. Even though the cut depth is only a quarter inch it looks very deep and dramatic, you don't need a lot of depth to come up with good contrast!
-